Tuesday, June 24, 2014

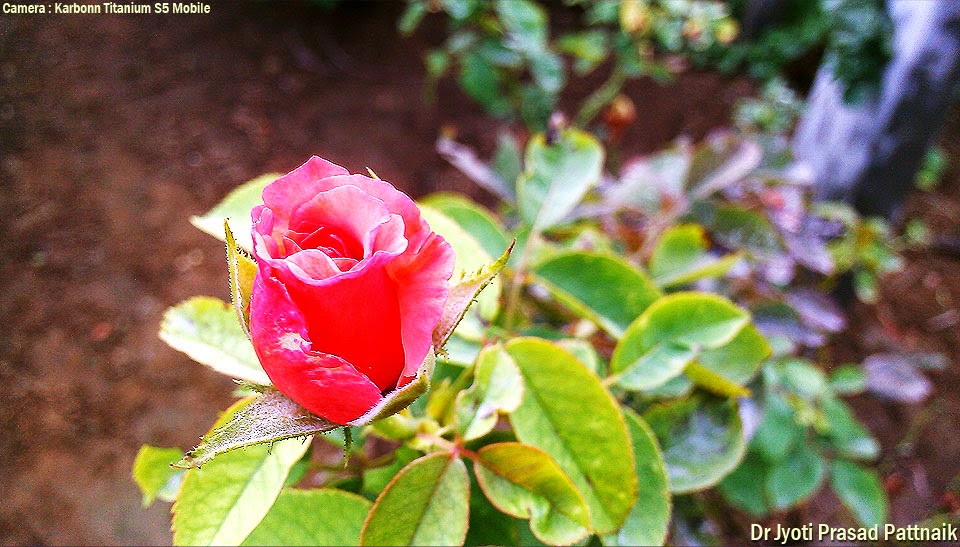
Experiments with my mobile camera

By: drjyotiprasad On: 12:09 AM
  • Share The Gag
  • Eversince I purchased the Karbonn Titanium S5 Mobile phone, I had been toying around with taking snaps here and there and posting it on facebook. I did however never try to use it as a Camera untill recently when I noticed that some people are using their mobile cameras to take awesome photos and are posting online too. One of them included my student Joshiya Kumar. I was a big fan of his creativity with his mobile.

    So here I am posting a compilation of some of the shots I have taken with my mobile camera. Although the quality of the image is not that good as the dslr I own, but still it is decent and also is handy as it is with me all the time and I can take photos in any situation. Also it requires not much manipulation like the other cameras. Just look at an object and click the shooting button. It is as easy as that.

    Wide angle shots with this camera were not as good as the macro shots. The mobile camera is basically a small camera and it has limited facilities. Although in your android enabled mobiles you can add many apps to give your mobile camera some functionalities like the shutter speed, aperture value etc. But believe me they are just trash and do not do what they are intended to do. I have used many apps in the past and then removed them from my mobile because I found the native camera on the android is the best without all those apps. Although ocassionaly I use the picsart app to give effects to some of my photos when I am in hurry to post the images online. Otherwise I usually download the images to my computer and edit them in photoshop, fotor or some other photo editing tool and then give a nice watermark at the bottom and then I post. Doing all these is not much hard too. Many people are doing this and I am also doing the same.

    Getting appreciated for your work is the best reward one can deserve. And whenever I have posted photos online people have liked them and I am glad I am shooting with my mobile camera. The camera on my mobile is a 8.0 MP camera, though telling you frankly I doubt it is not that big. It must be a simple VGA camera or a bit higher. Because I used a 7.2 MP camera earlier and the quality of the images with the digital camera was awesome, while with the mobile camera the pictures are just OK.


    Anyway, I am presenting some photos here which I have taken with my mobile camera. Hope you like them.

    http://shopclues.refr.cc/RK79P94

    Sunday, June 22, 2014

    Do the lapwings attack human beings ?

    By: drjyotiprasad On: 12:56 PM
  • Share The Gag
  • This afternoon after returning from my Sunday appointments at Surada with my Patients, I decided to go out for Bird watching, which I had not done for quite some time. My field of birding, Bada kusasthali and the water body near the village where I could see hundreds of birds during the winter had vanished with the summer and along the size of the pond which had become less than half the normal size.

    So after having my lunch, I proceeded to Badakusasthali and to my surprise, I found a group of bee eaters in front of the Central school, Berhampur and also handful of jungle bablers along with some cuckoos and pigeons. After taking some shots of those birds I proceeded to my final spot where many more birds may be waiting for me.
    Green Bee Eater

    Green Bee Eater with a catch

    Green Bee Eater

    Green Bee Eater

    Jungle Babler

    Spotted Dove


    Since the water-body in Badakusasthali has shrunk to less than half its capacity many birds are not seen there, including the lesser whistling ducks, spot billed ducks etc, and what ever is left they are remaining mostly hidden in big trees on the bank of the pond.
    Common Greenshank

    Purple swamp hen

    Common Greenshank in Flight

    Red Wattled lapwing hovering over my head

    Red Wattled lapwing hovering over my head

    Cattle Egret in flight


    Anyway as I was approaching the water body and trying to shoot some birds from a distance the birds were alerted about my presence by a pair of red wattled lapwings. Initially it looked innocent but soon I realized I could not take any photo because the pair of lapwings created so much noise that all birds what so ever were available fled from the pond to the trees and elsewhere. I was really annoyed and yet kept waiting and then decided to shoot the lapwings instead.

    Red Wattled lapwing hovering over my head and warning me
    When I approached the lapwings the duo agains Started shouting and making huge noise and at one moment I felt like the birds are actually coming towards me as if they want to attack me. It was quite unusual and they did not gather courage to come near me due to my long barrel of the telephoto (70-300mm) lens. But thanks to their approach I could take some good closeup shots of the lapwings in flight.

    Red Wattled lapwing hovering over my head
    I am still under the doubt that if these birds did really want to attack me or were eager to know what I was holding in my hands (camera) !

    Click here for a Surprise Gift

    Thursday, June 5, 2014

    101 things about Photography

    By: drjyotiprasad On: 12:18 PM
  • Share The Gag
  • By Eric Kim
    1. Just because someone has an expensive camera doesn’t mean that they’re a good photographer.
    2. Always shoot in RAW. Always.
    3. Prime lenses help you learn to be a better photographer.
    4. Photo editing is an art in itself
    5. The rule of thirds works 99% of the time.
    6. Macro photography isn’t for everybody.
    7. UV filters work just as well as lens caps.
    8. Go outside and shoot photos rather than spending hours a day on photography forums.
    9. Capture the beauty in the mundane and you have a winning photograph.
    10. Film isn’t better than digital.
    11. Digital isn’t better than film.
    12. There is no “magic” camera or lens.
    13. Better lenses don’t give you better photos.
    14. Spend less time looking at other people’s work and more time shooting your own.
    15. Don’t take your DSLR to parties.
    16. Being a photographer is sexy.
    17. Making your photos b/w doesn’t automatically make them “artsy”
    18. People will always discredit your work if you tell them you “photoshop” your images. Rather, tell them that you process them in the “digital darkroom”.
    19. You don’t need to take a photo of everything.
    20. Have at least 2 backups of all your images. Like they say in war, two is one, one is none.
    21. Ditch the neck strap and get a handstrap.
    22. Get closer when taking your photos, they often turn out better.
    23. Be a part of a scene while taking a photo; not a voyeur.
    24. Taking a photo crouched often make your photos look more interesting.
    25. Worry less about technical aspects and focus more on compositional aspects of photography.
    26. Tape up any logos on your camera with black gaffers tape- it brings a lot less attention to you.
    27. Always underexposed by 2/3rd of a stop when shooting in broad daylight.
    28. The more photos you take, the better you get.
    29. Don’t be afraid to take several photos of the same scene at different exposures, angles, or apertures.
    30. Only show your best photos.
    31. A point-and-shoot is still a camera.
    32. Join an online photography forum.
    33. Critique the works of others.
    34. Think before you shoot.
    35. A good photo shouldn’t require explanation (although background information often adds to an image). *
    36. Alcohol and photography do not mix well.
    37. Draw inspiration from other photographers but never worship them.
    38. Grain is beautiful.
    39. Ditch the photo backpack and get a messenger bag. It makes getting your lenses and camera a whole lot easier.
    40. Simplicity is key.
    41. The definition of photography is: “painting with light.” Use light in your favor.
    42. Find your style of photography and stick with it.
    43. Having a second monitor is the best thing ever for photo processing.
    44. Silver EFEX pro is the best b/w converter.
    45. Carry your camera with you everywhere. Everywhere.
    46. Never let photography get in the way of enjoying life.
    47. Don’t pamper your camera. Use and abuse it.
    48. Take straight photos.
    49. Shoot with confidence.
    50. Photography and juxtaposition are best friends.
    51. Print out your photos big. They will make you happy.
    52. Give your photos to friends.
    53. Give them to strangers.
    54. Don’t forget to frame them.
    55. Costco prints are cheap and look great.
    56. Go out and take photos with (a) friend(s).
    57. Join a photo club or start one for yourself.
    58. Photos make great presents.
    59. Taking photos of strangers is thrilling.
    60. Candid>Posed.
    61. Natural light is the best light.
    62. 35mm (on full frame) is the best “walk-around” focal length.
    63. Don’t be afraid to bump up your ISO when necessary.
    64. You don’t need to always bring a tripod with you everywhere you go (hell, I don’t even own one).
    65. It is always better to underexpose than overexpose.
    66. Shooting photos of homeless people in an attempt to be “artsy” is exploitation.
    67. You will find the best photo opportunities in the least likely situations.
    68. Photos are always more interesting with the human element included.
    69. You can’t “photoshop” bad images into good ones.
    70. Nowadays everybody is a photographer.
    71. You don’t need to fly to Paris to get good photos; the best photo opportunities are in your backyard.
    72. People with DSLRS who shoot portraits with their grip pointed downwards look like morons.
    73. Cameras as tools, not toys.
    74. In terms of composition, photography and painting aren’t much different.
    75. Photography isn’t a hobby it’s a lifestyle.
    76. Make photos, not excuses.
    77. Be original in your photography. Don’t try to copy the style of others.
    78. The best photographs tell stories that begs the viewer for more.
    79. Any cameras but black ones draw too much attention.
    80. The more gear you carry around with you the less you will enjoy photography.
    81. Good self-portraits are harder to take than they seem.
    82. Laughter always draws out peoples’ true character in a photograph.
    83. Don’t look suspicious when taking photos- blend in with the environment.
    84. Landscape photography can become dull after a while.
    85. Have fun while taking photos.
    86. Never delete any of your photos.
    87. Be respectful when taking photos of people or places.
    88. When taking candid photos of people in the street, it is easier to use a wide-angle than a telephoto lens.
    89. Travel and photography are the perfect pair.
    90. Learn how to read a histogram.
    91. A noisy photo is better than a blurry one.
    92. Don’t be afraid to take photos in the rain.
    93. Learn how to enjoy the moment, rather than relentlessly trying to capture the perfect picture of it.
    94. Never take photos on an empty stomach.
    95. You will discover a lot about yourself through your photography.
    96. Never hoard your photographic insight- share it with the world.
    97. Never stop taking photos
    98. Photography is more than simply taking photos, it is a philosophy of life
    99. Capture the decisive moment
    100. Write your own list.

    Courtesy : http://pixelpluck.com/100-things-about-photography/

    http://shopclues.refr.cc/RK79P94

    Trying to capture a big lightning in one frame

    By: drjyotiprasad On: 11:56 AM
  • Share The Gag
  • How to shoot Lightning


    Lightning in the dark cloudy skies creats panic amongst weak hearted people and for many people it is sign of iminent danger. Lightning can kills human beings as well as animals. So People tend to stay indoors during such thunder storms when big and loud lightning covers the whole sky. But for photographers it is a sign of doing something risky yet creating, trying to capture a big lightning in one frame.

    It is less easier than one thinks but is not much difficult either, with appropriate gears you can capture amazing lightning shots. It does not always have to be big bulky and costly equipments, you can get the same results with your digital / point and shoot cameras too.

    What is the basic theory behind shooting a lightning is simple, the more time you keep the aperture of your camera open the more light enters into it. In every camera there is a shutter speed, which means for how much time the shutter remains open. Small cameras do not have much scope though because many point and shoot cameras have shutter speed between 8-15 sec maximum to 1/2000 sec minimum. But not all cameras are capable of keeping the shutter speed fixed.

    Anyway if you wish to shoot lightning your camera should be able to fix the shutter speed at the longest time possible. It may be 8 Sec, 15 Sec, 30 Sec or more. In DSLR cameras there is a BULB mode where you can create a frame for as long as you keep the shutter button pressed. Anyway, the most important thing is there should be lightning in the sky.

    During summer some times there is surprise events in the sky, like thunderstorms which visit the coastal areas of our state. And during these events more than the rains the thunder and lightning come. So it is wise to utilise this time to shoot the thunders. Again the monsoon is fast approaching so be well prepared.

    Equipments required :
    1. Digital camera / DSLR with long exposure time
    2. Tripod for taking steady shots
    3. Patience and lightning

    How to do this ?
    1. In your camera fix the shutter speed to the maximum available time. In DSLR you can fix it to maximum of 30 sec or more (BULB mode) if you have a remote shutter release button.
    2. Use the widest lens available to cover the whole of the sky. In digital camera / PAS camera do not zoom.
    3. In dslr keep the lens in manual mode and take a test shot and adjust the focus to get the clean sky. In Digital / PAS cameras if the option is available do it else leave this.
    4. There is a aperture in your dslr camera fix it to mid range like f/8-f/14. And ISO between 200-800. So that you can get clean images. Although there is darkness and so you might be thinking with an aperture of f/8-f/14 how can we shoot, do not worry because lightning produces enough light which is many thousand times better than your flash in the camera.
    5. Keep your camera on a steady tripod or if not then you can use some plane surface where you can keep your camera for taking the shot. NOTE : Do not expose your camera to rain water.
    6. Focus to a big area of sky where lightnings are seen and press the shutter button. And wait till a shot is taken. You have to take a whole lot of shots till you really capture some good shots.
    7. I would suggest you use a remote shutter release button so that you can stay away from the wind and rain and yet shoot photos. In DSLRs it is wise to shoot in bulb mode for 3-5 minutes where you can really get some fantastic results.
    8. I would also suggest you take as many photos as possible. In DSLR you can keep the camera in burst mode and keep the shutter speed at 30 seconds so that untill you stop it the camera can go on shooting photos. SO that you can get many good result photos.

    What to do next ?
    Remember the photos straight out of your camera may not look as good / attractive as you see the photos on this blog and so you will need to update the contrast, colors of the photo and at the same time remove the noise from the image to get a good photo. YOu can use the photo editing software like Photoshop or other freely available software to create the amazing photo.

    So I hope you would be getting prepared to face the monsoons for an altogether new and creative reason. Good luck.

    http://shopclues.refr.cc/RK79P94